Padlet: now with the ability to download and print!

Screen Shot 2013-03-27 at 5.01.58 PM

What it is: Wallwisher has long been one of my go-to cool tools.  Recently, Wallwisher got a bit of a facelift as well as a new name: Padlet. Padlet is a fantastic little web application that provides a virtual bulletin board of sorts. Teachers can pose questions or ideas for students to answer or think about. Students are sent the unique wall URL and can leave virtual sticky notes answering the question. Students do not have to login to use Padlet, a simple double click allows them to add any thoughts they need to the wall. The platform is very simple to use but provides the opportunity for discussion and collaboration between students.  In addition to a brand new look, Padlet will now let you print or download your walls.  STINKING AWESOME!  Now you can take all of your Padlet walls and save them as an image, PDF, Excel or CSV format.  Just click the share/export button and you are in business!  Another fun new feature is the ability to keep up with what has been posted to your digital wall using email notifications.  You can sign up to get a daily update of all activity on the wall.

How to integrate Padlet into the classroom: Padlet can be used to create a flexible online space where students can create virtual posters, brainstorming boards, virtual project portfolios, and share learning with others.  Students can work together on the same Padlet space for group projects.

Padlet offers an exceptional opportunity for students to brainstorm, collaborate, and group ideas.  Students can use Padlet to brainstorm ideas for writing, explore lines of inquiry, collect research, for grouping ideas, and collaborating on group projects. Create a Padlet board for your students and ask them to group like ideas, sort, and expand on thoughts.  This could be done for any historical event, literature, science concept, and even phonics.  Students could practice spelling by typing out their spelling words along with a sentence or synonyms on sticky notes.  Then, they can group words by spelling pattern or common phoneme blends.  Create a Padlet of sticky notes with English words and sticky notes with a foreign language word on them.  Students can work together to group words with their meanings.   In math, create Padlet stickys with word problems on one color of sticky note and answers on another set of sticky notes.  Students can work to create groups of problems and their solutions.  Padlet can be used for whole class activities using an interactive whiteboard, the class can brainstorm together and collect ideas or use the grouping feature in an activity created by the teacher or students.

Students could even use Padlet to create “bucket lists.”  They could create a bucket list of books they would like to read, places they would like to travel, imaginary literary places they would like to travel, things they want to learn about, etc.

Padlet boards are SO versatile. If you need a way for students/teachers/parents to collaborate digitally, Padlet is the place.  Now that boards can be downloaded and printed…the possibilities for use are even greater!

Tips: See how others are using Padlet by visiting the new Padlet gallery.  You are sure to pick up some new great ideas for use!

Leave a comment and tell us how you are using  Padlet in your classroom.

This blog post brought to you in association with MyFactorySchweiz

The Future We Will Create: all the in-between important stuff

A few years ago I watched the documentary TED: The Future We Will Create.  Being a fan of TED talks, I was curious to learn more about the behind the scenes of TED talks and how the conference came to be.  I had heard snippets here and there that the TED conference was like a boys club…you had to have money and “be” somebody to get into a live event.  The documentary pulled back the curtain a little on the intentionality of the way that TED conferences are set up.  They are intentionally packed with entrepreneurs and successful people from various walks of life to bring together change makers.  The actual speakers may not be well known (at least not prior to the talk), they have a limited time to speak, and they share an inspirational message.  But TED isn’t really about the talks, TED is really about the talks that happen in between the talks.  It is about those serendipitous moments that happen when people are exposed to a shared inspiration and then have opportunity to dream about it together.  The magic is in those moments when people with different perspectives come together and share their thinking from that unique vantage point.  It is really about the in between moments, that seemingly empty and unimportant time.  TED does something else that I wasn’t aware of, they offer one TED speaker a “prize”.  Only the prize isn’t really a prize (not in the way we typically think about prizes), instead it is that this person gets to make a wish.  They get to cast a vision and a “what-if.”  They get to challenge the audience to solve a problem that matters to them.  Then comes the incredible part- these people actually use their unique gifts and talents and perspective to help make it so.  World changing.  A future that we create.  Together.


As I was pulling together resources for our current inquiry block about “sharing the planet,” I came across several fantastic TED talks that could act like a catalyst for deeper thinking and additional curiosity.  As I watched each video, I kept thinking about the behind the scenes, the in-between talks that aren’t documented.  The change happening as a result.

Then it hit me, we could do this at Anastasis.  We could watch these talks together, and then allow for the in-between talks.  We could be intentional and let our students engage in the discussion, the serendipitous moments of one thing leading to another, and another.  We could give our students time to just talk and wonder and discover together.  We could narrow it down to 3 or 4 TED talks and provide our students with serendipitous in-between.  We could open up the opportunity for our students to come up with the “wish” or challenge that the others would work to make happen.  We could empower our students to go through this same process and then watch them use their unique perspective, gifts and talents to find solutions and dream up new possibilities.

I’m excited to try this.  I believe that we are in the midst of genius every day at Anastasis.  These kids are really incredible.  I want to see what unfolds when we offer just a little inspiration related to our inquiry and then give them some space to just explore and talk.  I want them to see that when hunches collide, BIG world changing ideas happen.  I want them to understand that they are world changers.

Has anyone else done this with students?

I think that this will be a starting point.  For now we will watch talks.  Next year, I would love to have our students plan their own talks.  I want to invite the best-and-brightest from around the world to come listen to our talks.  I want to provide the in-between moments where change is enacted.

Stay tuned…

An inquiry into sharing the planet: embodied energy awesomeness

You may think that when I’m not posting here regularly, it is because I’ve run out of cool new technology to share…or maybe I’m just being lazy…or tired of blogging.  While I’ve had moments of the latter two, it really boils down to the 24 hours I have in a day.  Sometimes I choose sleep!

This week, I’ve been pulling together our last inquiry block of the year at Anastasis.  I can’t believe that we are down to counting weeks before we say goodbye for the summer.

Screen Shot 2013-03-18 at 9.31.35 PM

Our last inquiry block is an inquiry into sharing the planet.  For our 6th through 8th graders the focus is: “People can choose to take specific actions to help conserve Earth’s resources.”  Each time I put together an inquiry guide for teachers, I am sure to offer plenty of more detailed questions that they can use to help guide the inquiry.  Below are some of the questions I included.

  • What can people do to help conserve Earth’s resources?
  • What are other countries doing to help/hurt conservation?
  • How does United States demand impact Earth’s resources?
  • What country has the most impact on Earth’s resources/the least? Why do you think this is?
  • Is conservation a political issue?
  • What is ecological overshoot?
  • What is embodied energy?

I love helping teachers craft the opportunities for students to be curious, to dig into learning.  During this planning, I found the following resources that are too good not to share!

What it is: Embodied Energy free ebook download.  Created by a design firm, this ebook does a nice job explaining embodied energy.

How to use the Embodied Energy ebook in the classroom:  This ebook is a well designed book that will introduce students to the energy that we don’t see in the objects around us.  This pdf can be projected for a whole class, downloaded on individual student devices or, if you must, printed out.  Use this ebook along with the Sustainability by Design TED talk playlist to spark student interest into embodied energy and how it can impact the decisions we make every day.

Screen Shot 2013-03-18 at 9.31.51 PM

These introductory activities led me to the Energy Trumps project.  This is a design project by the Agency of Design that looked at using design to help people better understand, and take-in-to-account, the way that we build, design and consume.  I absolutely love the idea of students working together as a class to study a variety of materials.  Each student could create one (or several) of their own embodied energy trading  cards to help others understand the environmental impacts of materials.  Students can research key environmental properties of materials including embodied energy, embodied carbon, embodied water, recycled content, extraction intensity and years of reserves.  These can be used to compare materials at a glance.  (If you purchase the cards created by Agency of Design, you get the added bonus of an augmented reality feature that brings the material properties to life to explore in 3D.  Students can test out the different amounts of material they can get for one megajoule of energy.)

Take this a step further and ask students how they can use that information to help design a more sustainable future.  How can they hack every day objects?  How can they change the way that society builds, consumes, etc.?

How can the idea of embodied energy be communicated to a larger audience so that more of the picture is taken into account by the average consumer?

Any time I create a new inquiry block, I work to remember that we are in the business of apprenticing change makers.  These students matter and WILL change the world.  I love reminding students that age does not have to act as a restriction for world change.

Felix Finkbeiner is a student in Germany (similar in age to these Anastasis students) who is changing the world in HUGE ways.  Felix’s Plant for the Planet initiative has started a movement of planting trees…millions of them!  Read the an article about Felix here.

Felix has also addressed the United Nations with a speech to open the International Year of Forests which can be viewed here. 

Students can use this embodied energy calculator to explore their own curiosities.

The Happy Planet Index is a fantastic way to discover the extent to which 151 countries across the globe live happy and sustainable lives based on their efficiency, how many long and happy lives each produces per unit of environmental input.  Data can be viewed in map or table format.


I love the potential that a new inquiry block holds.  We offer guidance and some starting places to spark interest, but where students find passion is always exciting to watch unfold.  We truly are in the midst of genius in our students!

The other reason to love inquiry? The brilliant way that it allows room for transdisciplinary exploration, and touches each level of Bloom’s Taxonomy.  I mean really, how can you beat learning that looks like life?

E is for Explore: discovery, science, math, art, literacy, social studies and more!

E is for Explore!


Happy New Year!!  I have to say, I wasn’t heart broken to see 2012 go and welcome a year of new beginnings.  2012 felt…hard. And uninspired.  I think that is what happens when you see a dream realized and then comes the part where you are in the middle of it, making it work and doing the HARD work.  2012 wasn’t a year I felt particularly creative. I miss that, it is part of my essence.  I’ve been so incredibly busy, just working to keep everything going, that I had nothing left over.  I’m hoping that 2013 is a different story. Step 1: the first post of 2013.  Here is to creativity and passion!

What it is: I discovered a new blog that I am absolutely loving!  It is hard to beat a place where exploration is not only welcome, but encouraged.  E is for Explore is that place.  Here you will find new learning activities and a fantastic collection of ideas from other sources.  There is a handy-dandy index that helps you find just what you need quickly and easily.  I’ve been working on collecting resources for this inquiry unit and E is for Explore has been an absolute treasure trove.  Topics include discovery/exploration, science/engineering, mathematics, art, literacy, social studies and seasons/holidays.

How to integrate E is for Explore into the classroom:  E is for Explore is a great tool for unit, center, and inquiry planning.  I am really enjoying the huge bank of hands-on activities and projects all designed to encourage exploration in learning. The wide range of activities will keep sparking curiosity in a variety of disciplines.

As I plan out inquiry units and gather resources, I am always on the lookout for activities that will encourage students to explore and spark new curiosities.  E for Explore made this process infinitely easier, bringing me an easy-to-search collection of activities, with great instructions, all in one place.  Many of the activities are manageable enough for a center activity within the classroom…great for differentiation and individualization!

I shared E is for Explore with some of our students, they had a great time looking through the science experiments and learning about how to make mini robots and floam.  This would be SO much better than a small tic-tac-toe board for students to choose an activity from.  Students can explore the entire site and choose an exploration that is of interest to them and complete it accordingly.

Tips: My hope is that iLearn Technology does for you what E if for Explore did for me.  Did you know that you can search by keyword (at the top of my website) or through a multi-category search (in the sidebar on the right)?  Choose as many variables as you want and see what you can find!  I categorize every post by keywords, Bloom’s Taxonomy level, Grade Level, Resource Type, and Subject Area.  After 7 years of free resources, I’ve amassed quite a collection of awesome, free classroom tools.  Go ahead, give it a try and see what new fun finds you come across!

Leave a comment and tell us how you are using  E is for Explore in your classroom.

The Miniature Earth Project


What it is:  The Miniature Earth Project is a great website that poses the question: “what if the population of the Earth were reduced into a community of only 100 people?”  Based on this assumption, the site helps students understand what the breakdown of nationalities would be, religious representation, how many people would live in an urban area, how many people would have the majority of the world income, how many would live without clean world, those that live on less than $1.25/day, etc.  The purpose of the site is to break our quickly approaching 7billion people in the world down to a number (100) that we can more easily wrap our minds around.  The point of the site is to help kids (and adults) understand the real landscape of the world and cause positive action.

There is a video on the site that breaks down the infographic in a different way.  Students can submit their own videos about the Miniature Earth.

How to integrate The Miniature Earth Project into your curriculum: Right now the Jr. High at Anastasis Academy is looking at the following line of inquiry: “Understanding our rights and responsibilities as individuals and the similarities and differences of others helps contribute to the development of world citizens.”  The Miniature Earth Project is a great place to put the world’s challenges in perspective for students.  We have been having fantastic conversations about the rights that we enjoy as Americans, and the responsibilities to others around the world that come with those rights.  Students have also been exploring rights they believe all world citizens should enjoy and what responsibility they share in making those rights a reality for those who don’t currently enjoy them.  As you can imagine, the discussion has been fascinating!

A great place to start this discussion is by asking students to create their own personal code of conduct.  What standards will they hold themselves to?  At Anastasis we talk often about managing our freedom.  Freedom comes with responsibility, it isn’t a free-for all.  We also ask students to think about what their actions would look like if it were multiplied by 7 billion people.  What would the world look like?  Is it a place they would want to live?  The Miniature Earth Project is a great place for next steps. Looking at who makes up their world, what kind of challenges are faced.  We ask our students to think about solutions to those challenges.  They are NOT too young to come up with solutions!

Since the 100 person Earth is such a manageable number, ask students to create graphical representations of each figure presented in the Miniature Earth Project.  What questions do they have based on the data?  What challenges do they see?  What common ground do we have?  What are our responsibilities?  What rights should we claim for all humans?  What are ways that we can make the world a better place for all?  What impact can a small change make on such a large population (does it change when you think about it on a smaller scale)?

Want to show students how their actions can change the world?  Share the story of the 13 year old who has the world planting a million trees!  The story of Felix Finkbeiner is an awesome one!  Equally cool for our students: we have a Mr. Finkbeiner who teaches at Anastasis.

Tips: There are great links to more information about our population approaching 7 billion.  Be sure to have your students dig into those resources to learn more!

***Want to do your part as a CHANGE MAKER in education?  Check out, support and spread the word about the Learning Genome Project!

Please leave a comment and share how you are using Miniature Earth Project in your classroom!

A Plethora of habitat websites and activities

This post is going to be formatted a little differently than most are-so fair warning. 🙂  I do a lot of digging for resources and tools for our inquiry block at Anastasis Academy.  I thought it might be about time I shared the love here!  If you find it useful, I may include some more of these kinds of posts periodically.

Right now our students are learning about how the world works.  They are inquiring into animal habitats and needs.

Websites:

  1. Draw a habitat– my favorite from PBS!
  2. Plant and Animal Habitats from BBC has students working with the Sarah Jane Adventures team to complete a habitat interactive activity where students match aliens with the best habitat based on clues about both creature and habitat.
  3. Learn about habitats with this virtual text from BBC.
  4. Create a butterfly habitat by adding and removing plants.
  5. Explore the Deep Sea habitat with this interactive from National Geographic.
  6. Explore the Antarctica habitat with National Geographic’s Critter Cam.
  7. Build an online habitat with Switch Zoo.
  8. Design a Habitat with ARKive education.
  9. The Great Habitat Match with the Magic School Bus Gang.
  10. Walk in the Forest helps students learn about layers of habitats in the forest.
  11. Animal Homes (this is a good one for kindergarten or younger).
  12. Frog habitats– students help a frog find a new home.
  13. e-Learning for kids habitat interactive.

Activities:

  • Remember cootie catchers? Or fortune tellers?  They are easily folded out of a regular 8.5×11″ piece of paper.  Students can use cootie catchers to show their knowledge, and quiz each other, about habitats.  Ask students to each choose a different habitat to create their cootie catcher about.  Each flap can have a different word that describes the habitat (for example: desert might say “dry”, “barren”, “extreme temperatures”, “low vegetation”).  The next flap can have a type of animal that lives in that type of habitat.  The last flap can include a fact about why that habitat is perfect for the animal.  To play with the cootie catcher, one student chooses a word and the other spells the word out while opening and closing the cootie catcher.  The first student chooses a new word and the second student spells the word out while manipulating the cootie catcher.  On the final turn, the student chooses a flap to be opened to reveal the fact.
  • Create a complete ecosystem: photosynthesis, rain, decomposition, life cycles  http://cranberrycorner.blogspot.com/2010/07/summer-fun-ecosystem-edition.html 

There are SO many fun ways to explore habitats and animals…if you have outdoor space at your school, send students outside to explore the habitats they walk right by every day.

Dreaming: A look at Anastasis Academy

You may be wondering (or not) where the daily posts have been lately.  Believe me, it isn’t for lack of tools to share!  The slowness here is directly related to the time I am spending starting a school…as it turns out it is quite a bit of work! 😉  If you are a reader of all of my blogs, you have already seen this one, but for those of you who only follow me here, I thought I would give you a peek into the school I started this year.

Below, I share a picture of an incredible morning we had at Anastasis Academy where we welcomed singer/song writer Matthew West to join us for our morning devotion…we had NO idea it would result in the incredible private concert that it did.  What an enormous blessing to have Matthew share his time, creativity and passion with us.  Check out video of the morning on our school blog Stand Again.

|Kelly Tenkely|

It’s a pretty incredible thing to see dreams come to fruition.

For me it started with an obsession and passion for creating rich learning environments where every student was recognized as an individual. In that first post I wrote:

“I have a dreams of education. I have dreams of the way that schools should look. I have dreams of kids who find their passions. I have dreams of schools as rich learning centers.”

I had dreams of stripping the “vanilla” away so that passions could emerge.

Dreams of ditching that boxed curriculum that we call an education and watching the factory model fade into the rear-view mirror.

Dreams of ending the practice of viewing teachers (and students) as expendables.

I had dreams of schools that were beautiful, that were designed with students in mind.

Dreams that education would stop looking so much like the McRib.

Dreams of breaking free of the box, of valuing students and teachers,  of using the right tools, of a school where a student’s inner da Vinci can break through, of a school that customizes learning.

I shared dreams of more fabulous failures.

The dreams started trickling into reality in March of this year (2011).  In March I started getting some hints that these dreams weren’t really all that far-fetched.  By May I had officially started a school.  In August we opened the doors to Anastasis Academy with our first 50 students in 1st through 8th grade and had hired a dream team of 5 truly incredible teachers to lead them.  In four short months we went from dreams to reality.

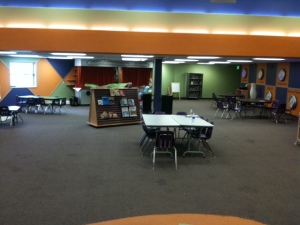
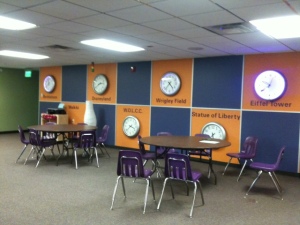
At Anastasis Academy, we lease space from a church building throughout the week.  We have our own wing with classrooms, a playground, a gym and a kitchen.  All of our furniture is on wheels.  This makes it easy to adjust space daily based on needs, it is also a necessity since we use shared space.  Twice a week we move all of our belongings across the hall into a storage room (if I’m honest, this is the part we could do without!).  We can’t complain about the space.  It is pretty incredible!

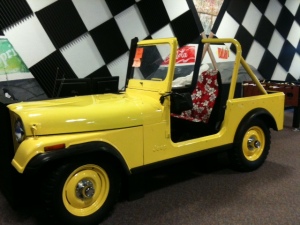
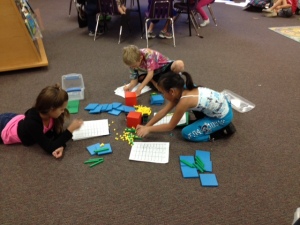
You will notice that we don’t have rows of desks.  No teacher’s desk either.  We have space that kids can move in. Corners to hide in, stages to act on, floors to spread out on, cars to read in.  We are learning how to learn together, learning how to respect other children’s space and needs, learning how to discipline ourselves when we need to, learning how to work collaboratively, we are learning to be the best us.


You won’t see a worksheet at Anastasis. We use iPads.  That isn’t to say that we ONLY use iPads, in fact, you’ll often see us building, cutting, pasting, writing on a whiteboard/chalkboard and even paper.  We do a lot of blogging, a lot of reflecting, a lot of Evernotting, a lot of cinematography, a lot of discussing.
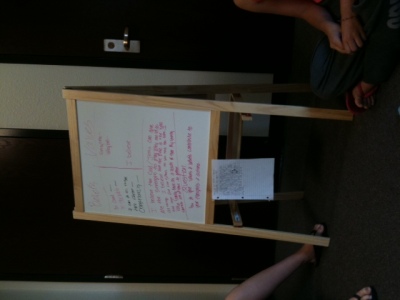
Every morning we start with a 15 minute walk outside together…as a community.  We invite parents and siblings to be a part of our morning walk. Occasionally we have the dogs join in on the fun.  After the walk we come inside as a whole-school for a time of devotions. Again, this is a time for us to build community, to foster the culture we want for our school.  Families are invited to join us every morning.  We always have at least one family and, many times, multiples.  We pray with each other and for each other. We have hard conversations and funny conversations. We think together and challenge each other.

Matthew West joining us for devotions!

Our inquiry block is a time for hands-on transdisciplinary learning.  This is my VERY favorite time to walk through classrooms.  It is incredible to see the joy in discovery.  It is incredible to have a second grade student with dyslexia discover an app to make stop motion animations, teach himself how to use it and proceed to stand up before 7th and 8th grade students to explain how stop motion works.  I wish I could bring you all through the building during this time.  Every time we have a visitor the students pause long enough to describe what they are doing, the learning that is happening. I often have to pick my jaw up off the floor. These kids are amazing.


We have no curriculum. At all. Zip. What did we do instead? We hired the very BEST teachers we could find.  We gave them a base level of skills that we wanted students to have- an outline if you will.  We used the Common Core Standards as our baseline.  We don’t use the standards like most schools do. We use them to make sure that our students have the building blocks and foundations of learning in place.  And then we let our students and teachers GO. The standards are not a weight we are tied to, they are the underpinnings that make it possible for us to soar and take our learning anywhere.  When you look at the Common Core standards they are pretty underwhelming.  I’m glad they are! They provide us with just enough momentum to propel us forward and then off we go on a journey of learning!  We also have our big inquiry questions in place.  From there, we go where the learning takes us, bunny trails and all.  It is pretty fantastic.  Today one of our primary students came out to see me and said, “Look at this boat I found in this new library book. Can I try to make it?”  My answer: “Absolutely! What materials do we need?”  Together we made a list of all the materials I needed to pull together for him.  Tomorrow he will build that boat he is fascinated with and find out if it works the way he has planned.  That is learning!  Tell me what boxed curriculum allows time for that to happen? None. That is why we don’t have it.
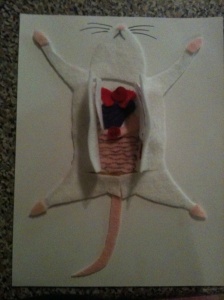
In the afternoons we have more “content” area subjects (i.e. math and language arts).  In the primary grades this means students building the skills they need to support their inquiry.  In the intermediate grades this means honing those skills for better communication and more thorough inquiry.  Again, we don’t work from a boxed curriculum. We find the lessons, approaches, and materials that work for the individual student.  Sometimes this means working with manipulatives, sometimes it means exploring measurement outside, and sometimes it means using an app.  It changes daily based on the needs of the students.
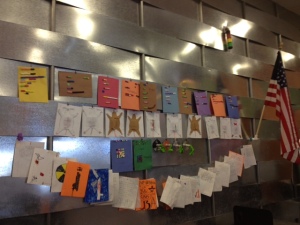
We have mixed age level classrooms.  We do this for a lot of reasons.  Most importantly, it is good for older and younger students to work together and learn from each other; it is vital that a child be able to work at their developmental level and progress as they are ready to; and it deepens inquiry when students with different perspectives work together.

Once every five weeks we invite the parents to join us for Parent University.  This is a time for us to help parents understand this new way to do school.  Detox, if you will.  It is a time for us to show parents what best practices in education look like, why grades aren’t all they are cracked up to be, why play is important.  It is a time for us to think and laugh together. It is a time to get questions answered.

Also every five weeks, we hold a “Meeting of the Minds”.  This is a parent/teacher/student conference where we all get together and set our road map for the next 5 weeks.  Students write goals with the help of their teacher. They have ownership over what they have done the last 5 weeks and tell mom and dad what they have planned for upcoming 5 weeks.

Every Friday we have a learning excursion or an opportunity for an “Anastasis Serves”.  Learning excursions are field trips all over the place that help students start to recognize that learning doesn’t just happen when we are at school.  Learning happens everywhere we are and, if we are paying attention, all the time.  Anastasis Serves is a time for our students to give back to the global community.  Sometimes this is a door-to-door scavenger hunt for donations, sometimes this is learning about orphans around the world, or packaging cookies and letters to send to our troops.

We don’t do grades, we do assessment all day every day while we learn.  We don’t do homework, we pursue our families and passions at home.  We don’t do worksheets, we do interesting (sometimes frustrating) work. We don’t do boxed curriculum, we do on-demand learning.

We do mistakes. We do community. We do collaboration. We do messy. We do play. We do fun. We do technology. We do learning.

How do we do all this? We have a 12 to 1 student teacher ratio (or less).  We have incredible students, parents and teachers.  We have stinking smart board members who are invested in our success and trust our judgement calls.  We set our tuition at $8,000 (per pupil spending in our district) to show that even though we are private, this can be done in the public schools.  We started with nothing…well almost nothing, we had dreams.  There was no capital raised, no fund-raisers, no huge donation. We started the beginning of the year at $0 and put blood, sweat and tears into it.

This is not to say that we have it all figured out, that all of our students are perfect, that all of our staff or families are perfect. We are perfectly imperfect as every school is. We have days when the kids are BOUNCING off the walls, we have disagreements, tired teachers, stressed parents, a founder who has occasional melt downs (that would be me), students who need extra love and support, tight budgets, parents who demand different, scuffles, sniffles and band-aids…lots of band-aids.  There is nowhere else I would rather be. No other group of people I would rather work with. No other students whose germs I would rather share. This is my dream.

There are moments throughout the day when I am stopped in my tracks by the realization-this is my dream.

A Periodic Table of Visualization Methods

What it is: The Periodic Table of Visualization Methods is a brilliant collection of visualization methods for displaying, understanding and using information.  The periodic table is broken down into data visualization, information visualization, concept visualization, strategy visualization, metaphor visualization, and compound visualization.  Each “element” of the table includes information about the element such as if it is a process visualization or a structure visualization.  Each “element” also includes cues about what kind of thinking the visualization requires (divergent or convergent).  As you move your mouse over the table, an example of the “element” pops up.  As I said, brilliant!  The Periodic Table of Visualization is an excellent way to help students (and teachers) understand and explore visual literacy.

How to integrate A Periodic Table of Visualization Methods into the classroom: A Periodic Table of Visualization is a great place to start helping your students understand how to decode visual information as well as how to create visual representations of information.  I’m a HUGE fan of infographics, graphic organizers, charts, graphs, mind maps, etc.- definitely a visual learner!  Students often come across visual information graphics in their reading for the classroom.  Unfortunately, we don’t always spend time helping students understand that visual information because we are SO focused on the text.  The Periodic Table of Visualization gives you a one-stop-shop to discuss the different kinds of visual data, helping students understand how to “read” and decode that information.  These are great critical thinking activities because they ask students to process information in a different way.  Use the Periodic Table with an interactive whiteboard or projector-connected computer to expose students to examples of different types of visual information.  Talk about each one and how information is being conveyed.  If you have interactive whiteboard software, use the annotation feature to “stamp” or keep track of the different kinds of visual data students come across during the year in their reading.  Make it a year-long goal to find an example of each type of visualization.  This will keep your students looking for and engaging with visual literacy.

Take it a step further and encourage your students to create their own information graphics and visualizations.  After some learning that was completed, ask students to choose one of the “elements” from the table of visualization and create their own graphic or table.

I love the way that a Periodic Table collects and organizes information.  Currently I am working on the first unit of inquiry for students at Anastasis Academy.  From first through eighth grade, all of the units are focused around community.  I thought it might be fun to create our own periodic table of community.  Each student can add an “element” that makes up community.  Instead of just pictures popping up on our periodic table, I thought students could add video, photos, text, or audio.  Each student will add to the community periodic table and we will use this as part of our school code of conduct.  Here is what I am thinking: Each student will learn about community and choose a method of sharing what they learned (video, audio, text, photo).  They will create their “element” using their iPad and add it to their online portfolio at edu 2.0.  I can easily access all files from one place (edu 2.0) and add the projects to a periodic table of elements that I create on Wix.com.  I’ll link from the Table to the student projects and voila, a Periodic Table of Community.  I’ll let you know how it works in practice 🙂

Another related idea: create a Periodic Table of Students during the first weeks of schools.  Add each student’s picture to the periodic table along with their class room number and initials as their Element information.  This can be printed out and turned into a bulletin board for the classroom or shared on an interactive whiteboard or projector-connected computer with parents at back to school night.  If you have “star” students in your classroom (or VIP) you might add the student picture to the periodic table when it is their week to share and shine.

Tips: Thank you to my friend @artysteph26 for sharing this awesome resource on Twitter yesterday.  Thanks Steph!  **Reminder: if you don’t have a personal learning network on Twitter, I highly recommend spending some time on that this summer.  That small time investment is worth it’s weight in gold I tell ya!

Please leave a comment and share how you are using  A Periodic Table of Visualization Methods in your classroom!

Using Angry Birds to teach math, history and science

This post has been generously sponsored by iTutorMaths – GCSE Maths Tutors in the UK

Yesterday instead of dutifully writing a blog post, I was having fun building catapults with kids.  I was playing with a transdisciplinary lesson using Angry Birds as my inspiration.  Yes, you read correctly-Angry Birds.

It doesn’t seem to matter what age group or demographic that I talk to, kids (and adults) everywhere are fans of Angry Birds. As I was playing around with Angry Birds (yep I’m a fan too), I started thinking about all of the learning that could be happening.  I have watched a two year old tell an older sister that “you have to pull down to go up higher”.  I have watched as kids master this game through trial and error.  Being the teacher that I am, I started dreaming up a transdisciplinary lesson with Angry Birds as the base.

I happened to be writing an inquiry lesson that has students look at inventions throughout time and thought: the catapult-that is an invention that has technology and concepts that are used even today.  This is one of those inspirational moments that comes when you are drifting off to sleep and has you frantically searching for paper and pen to record as fast as the ideas come.  So what did I do? I got myself out of bed and went to work sketching out a super awesome plan.

Here is the embedded learning that I came up with:

  • Primary Math: positional math language (above, below, left, right, bottom, biggest, smallest), measurement (distance), angles, shapes
  • Intermediate Math: parabolas, velocity, angels, trajectory, acceleration, quadratic formulas
  • Science: simple machines (lever), mechanics, force, energy, velocity/speed
  • History: history of the catapult, changes made to catapult technology throughout history, modern-day inventions that use this technology
  • Music: Tie in with history, what music was popular in the middle ages when catapults were invented (give students a feel for the culture of the time).
  • Art: Tie in with history, what era of art was happening during the middle ages when catapults were invented (give students a feel for the culture of the time).
  • Language Arts: reflection writing, reading text for information (non-fiction books and websites)
  • Learning: application of Angry Birds on students as learners, application of building a catapult on students as learners (I can’t claim this one it was all @stumpteacher with this blog post).

I set up 3 stations of learning and exploration.   In the first station students found Angry Birds on the iPads (now also available on the Internet in Chrome here), guiding questions, sticky notes and books on the history of catapults and simple machines.  Guiding questions were on chart paper and invited kids to join in the question asking by jotting down their own “wonders” on sticky notes and adding them to the chart questions.  At this station students “tested” Angry Birds and were asked to consider energy, force, acceleration, speed, angle and distance as they played.  Kids had fun with this, I anticipated that they would stick strictly to the  iPad and Angry birds but all of the kids looked through the books at some point.  There was a lot of talk about strategy, what they noticed about angle and how far to pull back on the different levels to get the bird to reach the target.

At Station 2 students found random materials that they could use to build their own catapult.  We included small blocks of wood, duct tape, string, rubber bands, paper clips, plastic cups, smaller dixie cups, paint stir sticks, popsicle sticks, plastic silverware,  markers, empty toilet paper rolls, clothes pins and of course the marshmallow to launch.  Students colored their marshmallow with sharpies to look like an Angry Bird (if doing this with kindergarten, be sure to mention that as soon as the marshmallow is colored, it is no longer food…we had a couple who were begging to eat the colored mallow!).  Next, students went to work constructing their catapults.  We offered no instructions and just let them go to town.  There was a lot of trial and error but all of the kids (kindergarten through eighth grade) made working catapults.  Students tested their catapult and experimented with speed, distance, accuracy, fulcrum, angle and force.  After launching the marshmallow bird they measured for distance and recorded.

As students tested we asked them:

  • What makes the catapult more accurate?
  • What makes the bird go the furthest?
  • Does mass affect the results?
  • How do objects move?
  • How do we calculate motion?
  • What is acceleration?
  • What is speed?
  • What are some forces that act on objects in motion?
  • How did the catapult set the marshmallow in motion?
  • Which challenge did your catapult meet best, accuracy or distance?
  • What helped the catapult?
  • What kind of energy did your catapult use?
  • What kind of force?
  • What are other kinds of levers?
  • What are simple machines?
  • What happens when the arm of a lever is shortened or the load is moved?
  • What happens to the force needed to make the load move?
  • What happens when you move the fulcrum?
  • What is the relationship between force and distance?
  • What happens when you adjust the angle?

Students had a fantastic time learning through trial and error and working together to reach our pig targets.  The collaboration among students was neat to watch, students would give each other ideas for fine-tuning the catapults to improve results.

In the third station, students had the opportunity to reflect on what they learned.  We asked them to reflect literally and figuratively.  Literally what did you learn about how a simple machine works, parabolas, measurement, etc.  What did you learn about catapults and how the technology is used today?  Then we asked them to think about the activity figuratively, what can Angry Birds teach them about life? What can it teach them about the learning process?


Older students looked at the math and science behind Angry Birds, using screen shots to determine if a bird would make it to the pigs based on parabolas.

Younger students labeled their catapult diagram with the language they learned about simple machines, force, and motion.  Students also labeled the Angry Birds diagram.

To wrap up we discussed the middle ages as a class and went through some of the texts together.  We read the history of the catapult and talked about why it was a necessary invention.  We connected all of this with how the technology is currently being used on air craft carriers (the boys really got into that discussion).

Who knew you could learn so much from a game of Angry Birds?

Here are some of the resources that we used during this lesson:

Projectile Motion simulation

Angry Birds Pig Target

Catapult guide for students

Myth Busters YouTube clip of tree catapult

The Physics of Angry Birds

Angry Birds Geogebra

WICKED Science Interactives

What it is: I found WICKED Science interactive through a tweet from my friend @kathleen_morrisWICKED Science interactives help students understand the earth- what it looks like, what it is made of, and how it works.  Students can explore the earth’s surface, examine features of the earth’s crust, explore the rock cycle, discover what the earth is made of in a lab, learn about heat and pressure, and look at different descriptions of the earth.

How to integrate the WICKED Science Interactives into the classroom: I like that these interactives invite students to explore and question.  They don’t offer all of the answers and lead students mindlessly through a predetermined solution, but instead give students just enough information to ask more questions.  Students observe and interact with the activities and have opportunities to think and problem solve their way to learning.  For this reason, WICKED interactives would make a great introductory learning activity.  Students can begin inquiring about the earth during the interactive and follow-up by digging into the concepts deeper elsewhere.  These interactives would be great for whole class use on a projector-connected computer or interactive whiteboard or for small-group/partner use on classroom computers.  Each interactive gives students more information about the earth and invites further investigation.

Tips: WICKED Science Interactives requires the Shockwave plugin to view the interactives.  The plugin can be downloaded from the site if needed.

Please leave a comment and share how you are using the WICKED Science Interactives in your classroom!